The e-KYC verification is a crucial step in the UP DigiShakti Portal tablet/smartphone distribution process. This page provides a comprehensive guide to completing your e-KYC verification through the MeriPehchaan platform.
What is e-KYC and Why Is It Required?
Electronic Know Your Customer (e-KYC) is a digital verification process that authenticates your identity using your Aadhaar details. For the UP DigiShakti Portal, e-KYC is required to:
- Verify your identity as an eligible student
- Ensure tablets/smartphones are distributed to genuine beneficiaries
- Streamline the verification process through digital means
- Prevent duplication and misuse in device distribution
- Create a transparent and auditable distribution system
Complete Step-by-Step e-KYC Process
Follow these detailed steps to complete your e-KYC verification on the DigiShakti Portal:
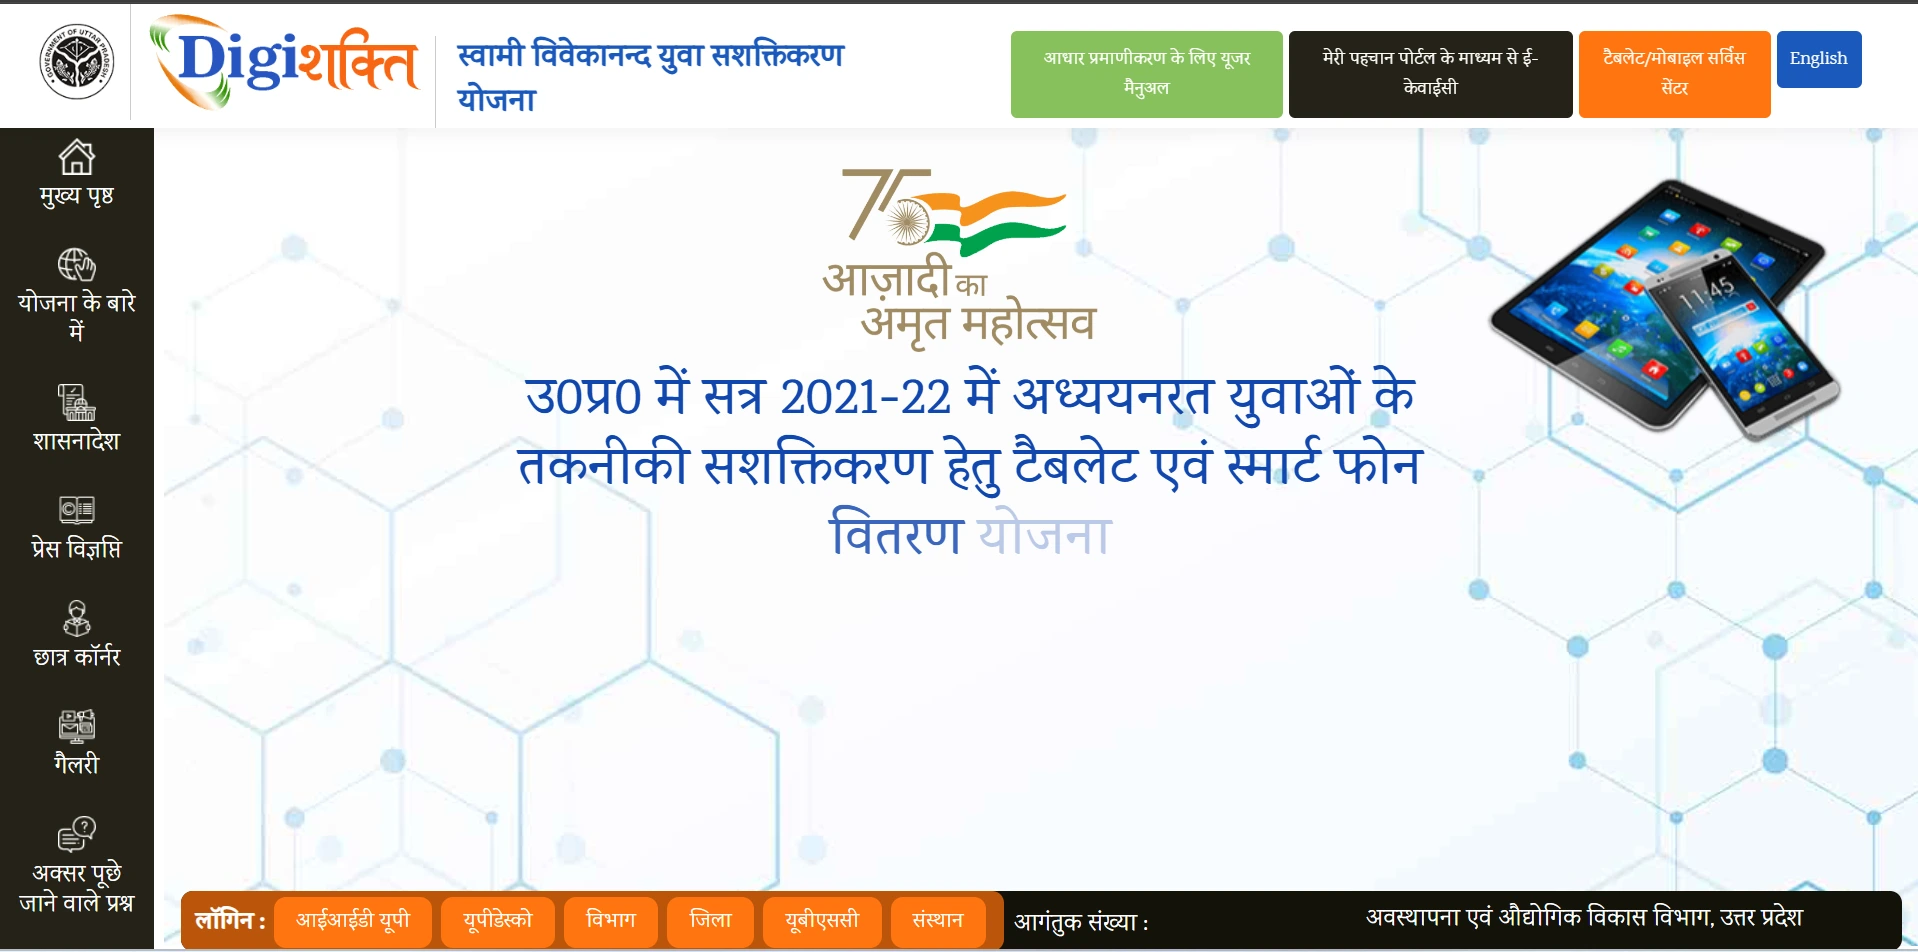
1 Access the DigiShakti Portal
Visit the official UP DigiShakti Portal at https://digishakti.up.gov.in/
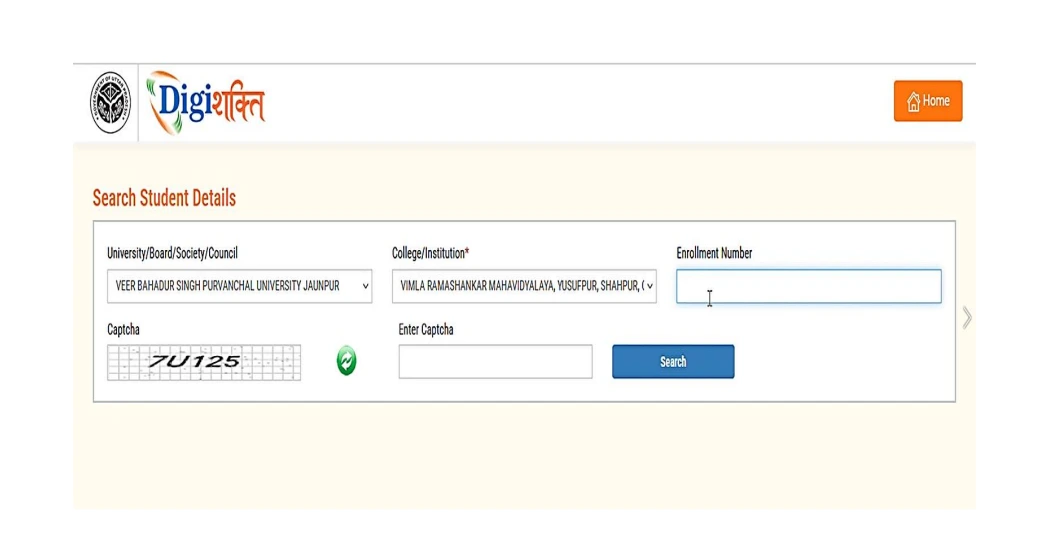
2 Enter Student Details
On the homepage:
- Select your University/Board/Society/Council from the dropdown menu
- Select your College/Institution from the dropdown menu
- Enter your enrollment number correctly
- Enter the captcha code shown on the screen
- Click on the "Search" button
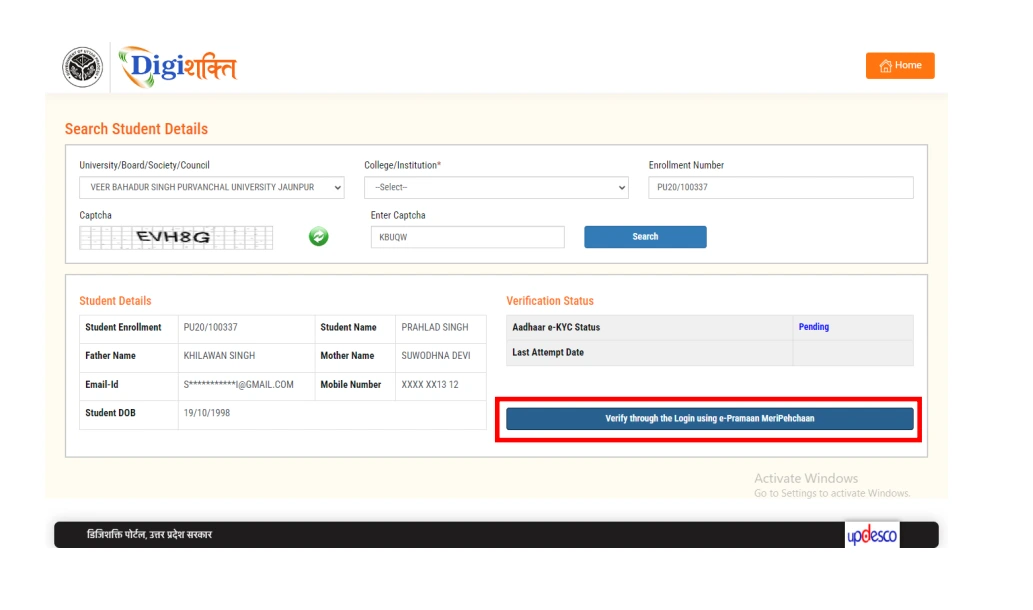
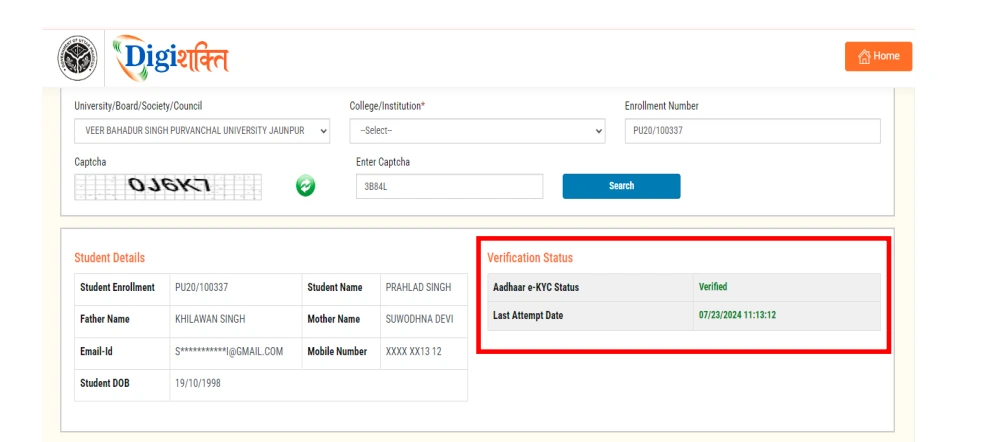
3 Verify Student Information
After clicking "Search," your details will be displayed on the screen:
- Verify that your personal information is correct
- Check your e-KYC status (it will show "Pending" if not completed)
- Click on the "Verify through the Login using e-Pramaan MeriPehchaan" button
4 MeriPehchaan Sign-Up/Sign-In
You'll be redirected to the MeriPehchaan portal:
- For new users: Click on "New user? Sign up for MeriPehchaan"
- For existing users: Sign in with your MeriPehchaan credentials
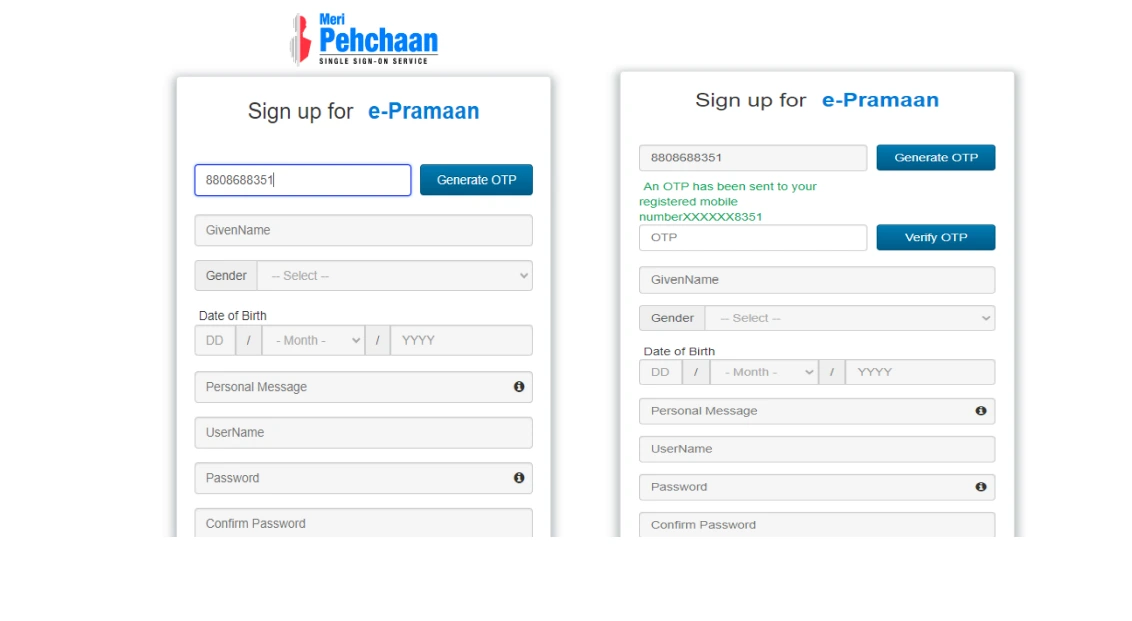
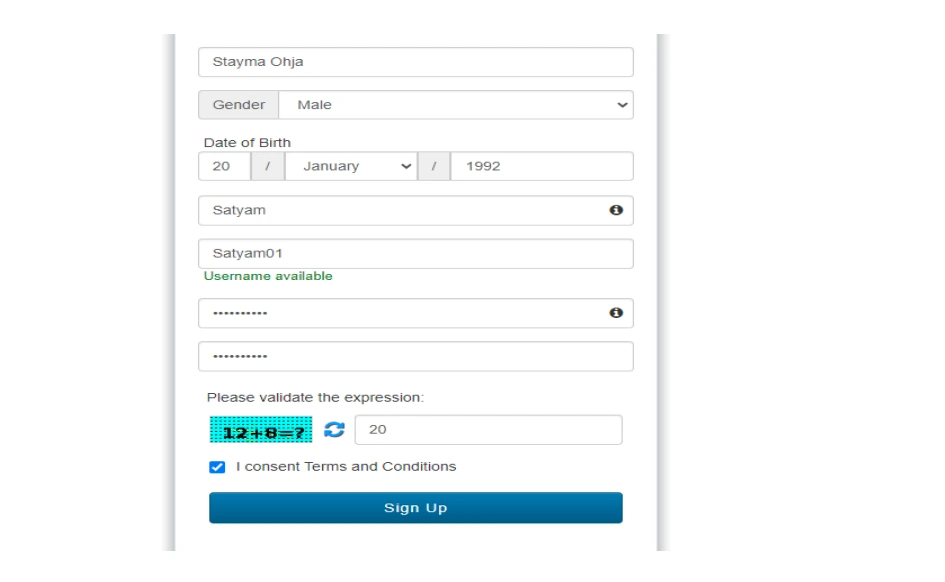
5 New User Registration (For new users only)
If you're a new MeriPehchaan user, follow these steps:
- Enter your mobile number and verify it using OTP
- Fill in your personal details exactly as they appear on your Aadhaar card:
- Full name (as per Aadhaar)
- Date of birth (as per Aadhaar)
- Gender (as per Aadhaar)
- Create a secure username and password
- Accept terms and conditions
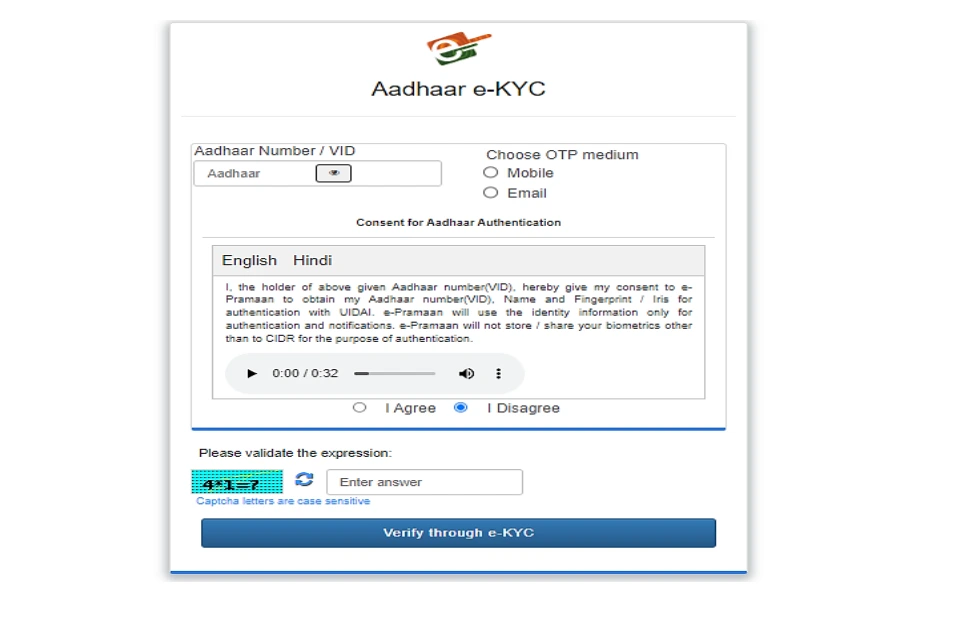
6 Aadhaar e-KYC
Complete the Aadhaar e-KYC verification:
- Enter your 12-digit Aadhaar number
- Select your preferred OTP medium (mobile or email linked to Aadhaar)
- Click on "Verify through eKYC" button
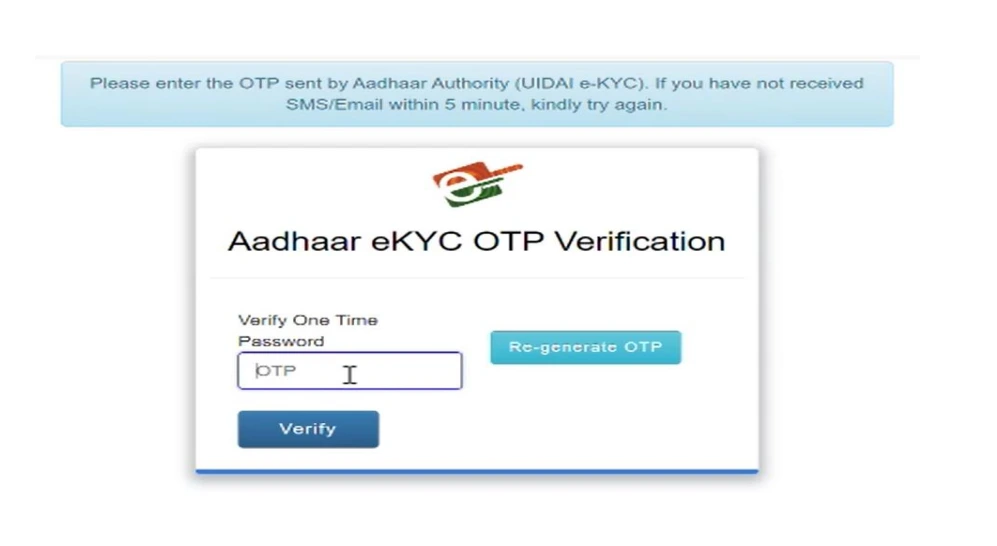
- Enter the OTP received on your Aadhaar-linked mobile/email
- System will verify your biometric information from UIDAI
Enter the OTP received on your mobile:
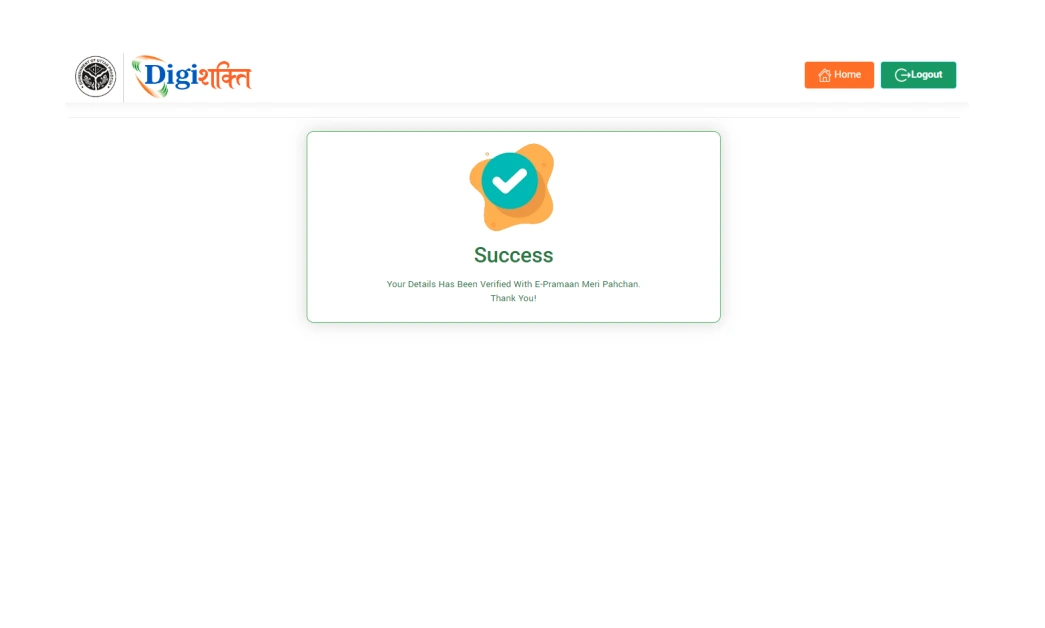
7 Verification Complete
Upon successful verification:
- You'll see a success message on the MeriPehchaan portal
- You will be redirected back to the DigiShakti portal
- Your information will be automatically sent to the DigiShakti system
8 Check Verification Status
After completing the e-KYC process:
- The verification status on the DigiShakti portal will change to "Verified" if successful
- Your data will now be visible to your institution and district nodal officers
- Your verification will be processed through institution, university, and department levels
- Once all approvals are complete, you'll be eligible for device distribution
🔎 Requirements for e-KYC Verification
- Valid Aadhaar Card: With correct details (name, DOB, gender)
- Mobile Access: To the Aadhaar-linked mobile number for OTP
- Enrollment Number: From your educational institution
- Data Consistency: Your institution must have uploaded your correct details
- Matching Information: Your data must match between institutional records and Aadhaar
Common e-KYC Issues and Solutions
If you encounter issues during the e-KYC process, refer to this troubleshooting guide:
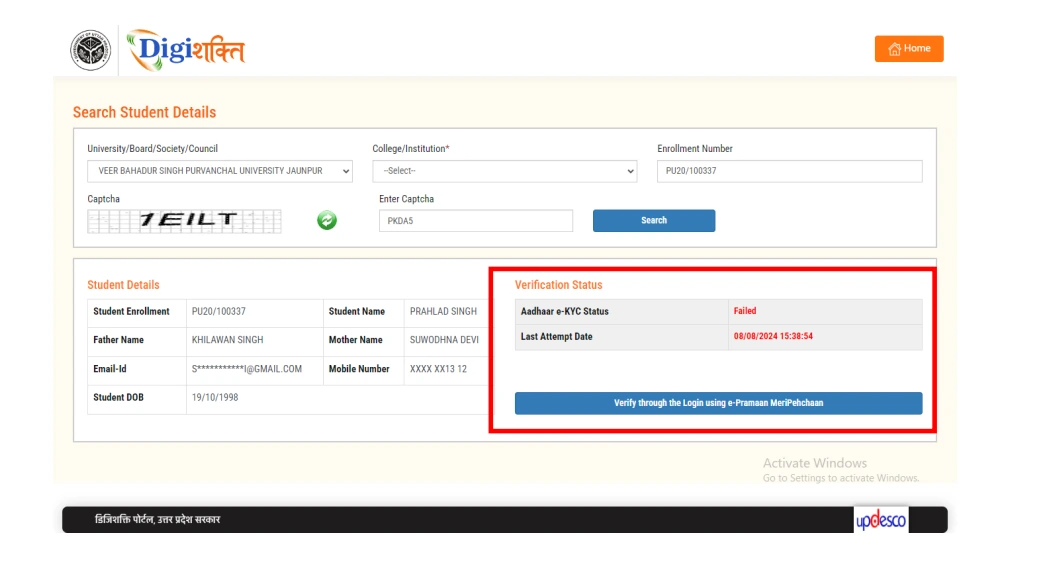
Example of Failed e-KYC Status
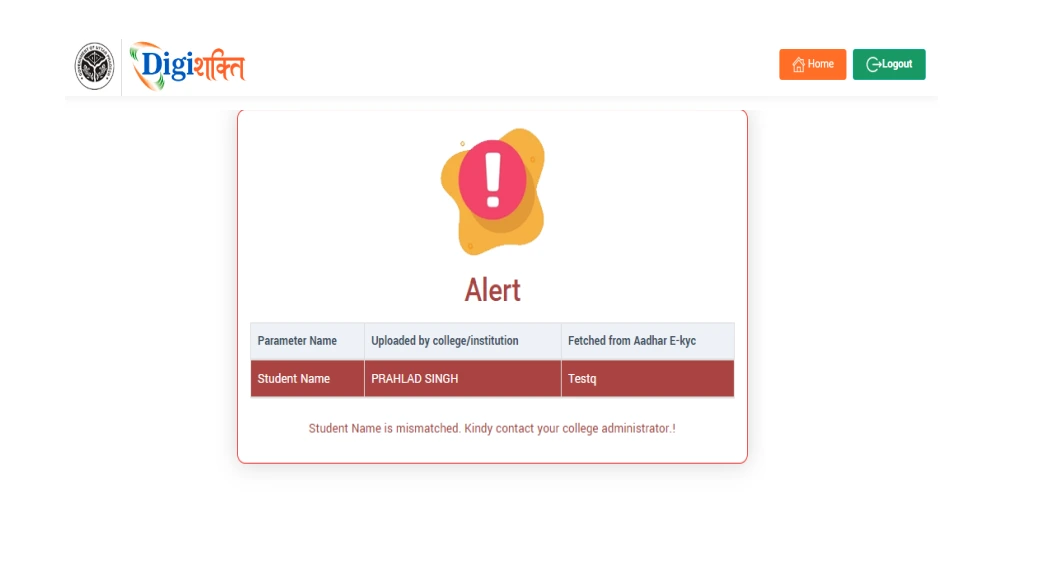
Data Mismatch Error Message
| Issue | Possible Cause | Solution |
|---|---|---|
| Name Mismatch | Your name in institution records doesn't match Aadhaar record | Contact your Institution Nodal Officer to update your information in the portal |
| Date of Birth Mismatch | Your DOB in institution records doesn't match Aadhaar record | Contact your Institution Nodal Officer to update your information in the portal |
| OTP Not Received | Aadhaar-linked mobile number is different or inactive | Check if your mobile number is correctly linked to Aadhaar. If not, update it through UIDAI services |
| MeriPehchaan Registration Error | Technical issue or internet connectivity problem | Try using a different browser, clear cache, or use a stable internet connection |
| Verification Failed | Critical data mismatch or Aadhaar not seeded correctly | Check for typographical errors in Aadhaar number; update institution records if needed |
| Server Error | High traffic or maintenance on portal | Wait for some time and try again during non-peak hours |
| Status Still Shows "Pending" | System update delay | Wait for 24-48 hours for the status to update |
After Successful e-KYC
After successfully completing your e-KYC verification, here's what happens next:
- Institution Verification: Your institution verifies your eligibility as a student
- University/Board Approval: Your University/Board approves your eligibility
- Department Locking: The department finalizes and locks your data
- Distribution List: Your name is included in the tablet/smartphone distribution list
- Device Allocation: A device is allocated to you based on your course and eligibility
- Distribution Notification: You'll be notified about the distribution date and venue
- Device Collection: Collect your device on the designated date with necessary documents
You can track your application status at any time by logging into the UP DigiShakti Portal. For more information on checking your status, visit our Status Check page.
Frequently Asked Questions
Is e-KYC mandatory for receiving a tablet/smartphone?
Yes, e-KYC verification is mandatory to confirm your identity and eligibility for the tablet/smartphone distribution program.
Can I update my Aadhaar information through the DigiShakti Portal?
No, Aadhaar information updates must be done through official UIDAI services. The DigiShakti Portal only verifies your existing Aadhaar information.
How long does the e-KYC verification process take?
The actual e-KYC verification is instant. However, the subsequent processing through institution, university, and department levels can take 1-2 weeks.
Can I use someone else's Aadhaar for verification?
No, using someone else's Aadhaar for verification is illegal and will result in rejection of your application and possible legal consequences.
What if my Aadhaar is not linked to my mobile number?
You need to first update your mobile number in your Aadhaar through the nearest Aadhaar Seva Kendra or UIDAI-approved centers.
Do I need to complete e-KYC multiple times?
No, you only need to complete e-KYC once. However, if your verification fails, you may need to retry after resolving the issues.
For any assistance with the e-KYC process, contact your Institution Nodal Officer or the DigiShakti Portal support team at support@DigiShaktiPortal.com.